I like getting work done on my iPhone and iPad. At times it gets impractical (I’m looking at you Stata), but there are lots of simple actions that I can do from my iOS devices, oftentimes faster than I can do on my Mac. One task that I always thought I should be able to quickly do from my iOS device is save a file from Safari, Mail, or any other app to a folder on Dropbox. This has been a pretty clunky process involving using the “Open In…” menu, opening a file in the Dropbox app, choosing a folder, tapping Save, and returning to the original app.
With the release of Workflow, I can finally say that it’s just as easy to save a file on iOS as it is on my Mac.
If you haven’t heard about Workflow, it’s a $2.99 app that lets you build custom actions that you can run from your device. Unlike previous workflow apps like Pythonista and Editorial, Workflow is extremely easy for non-programmers to use. Lots has been written about it since its release in December, ranging from the simple to the extensive to the extremely nerdy. This app can do a million things, but in this post I will focus on an extremely useful, and extremely simple to set up, action to save a file.
The final product
I often come across a PDF in Safari that I’d like to save. With Workflow, I tap “Open In…,” select “Run Workflow,” and choose one of three actions that I’ve set up:
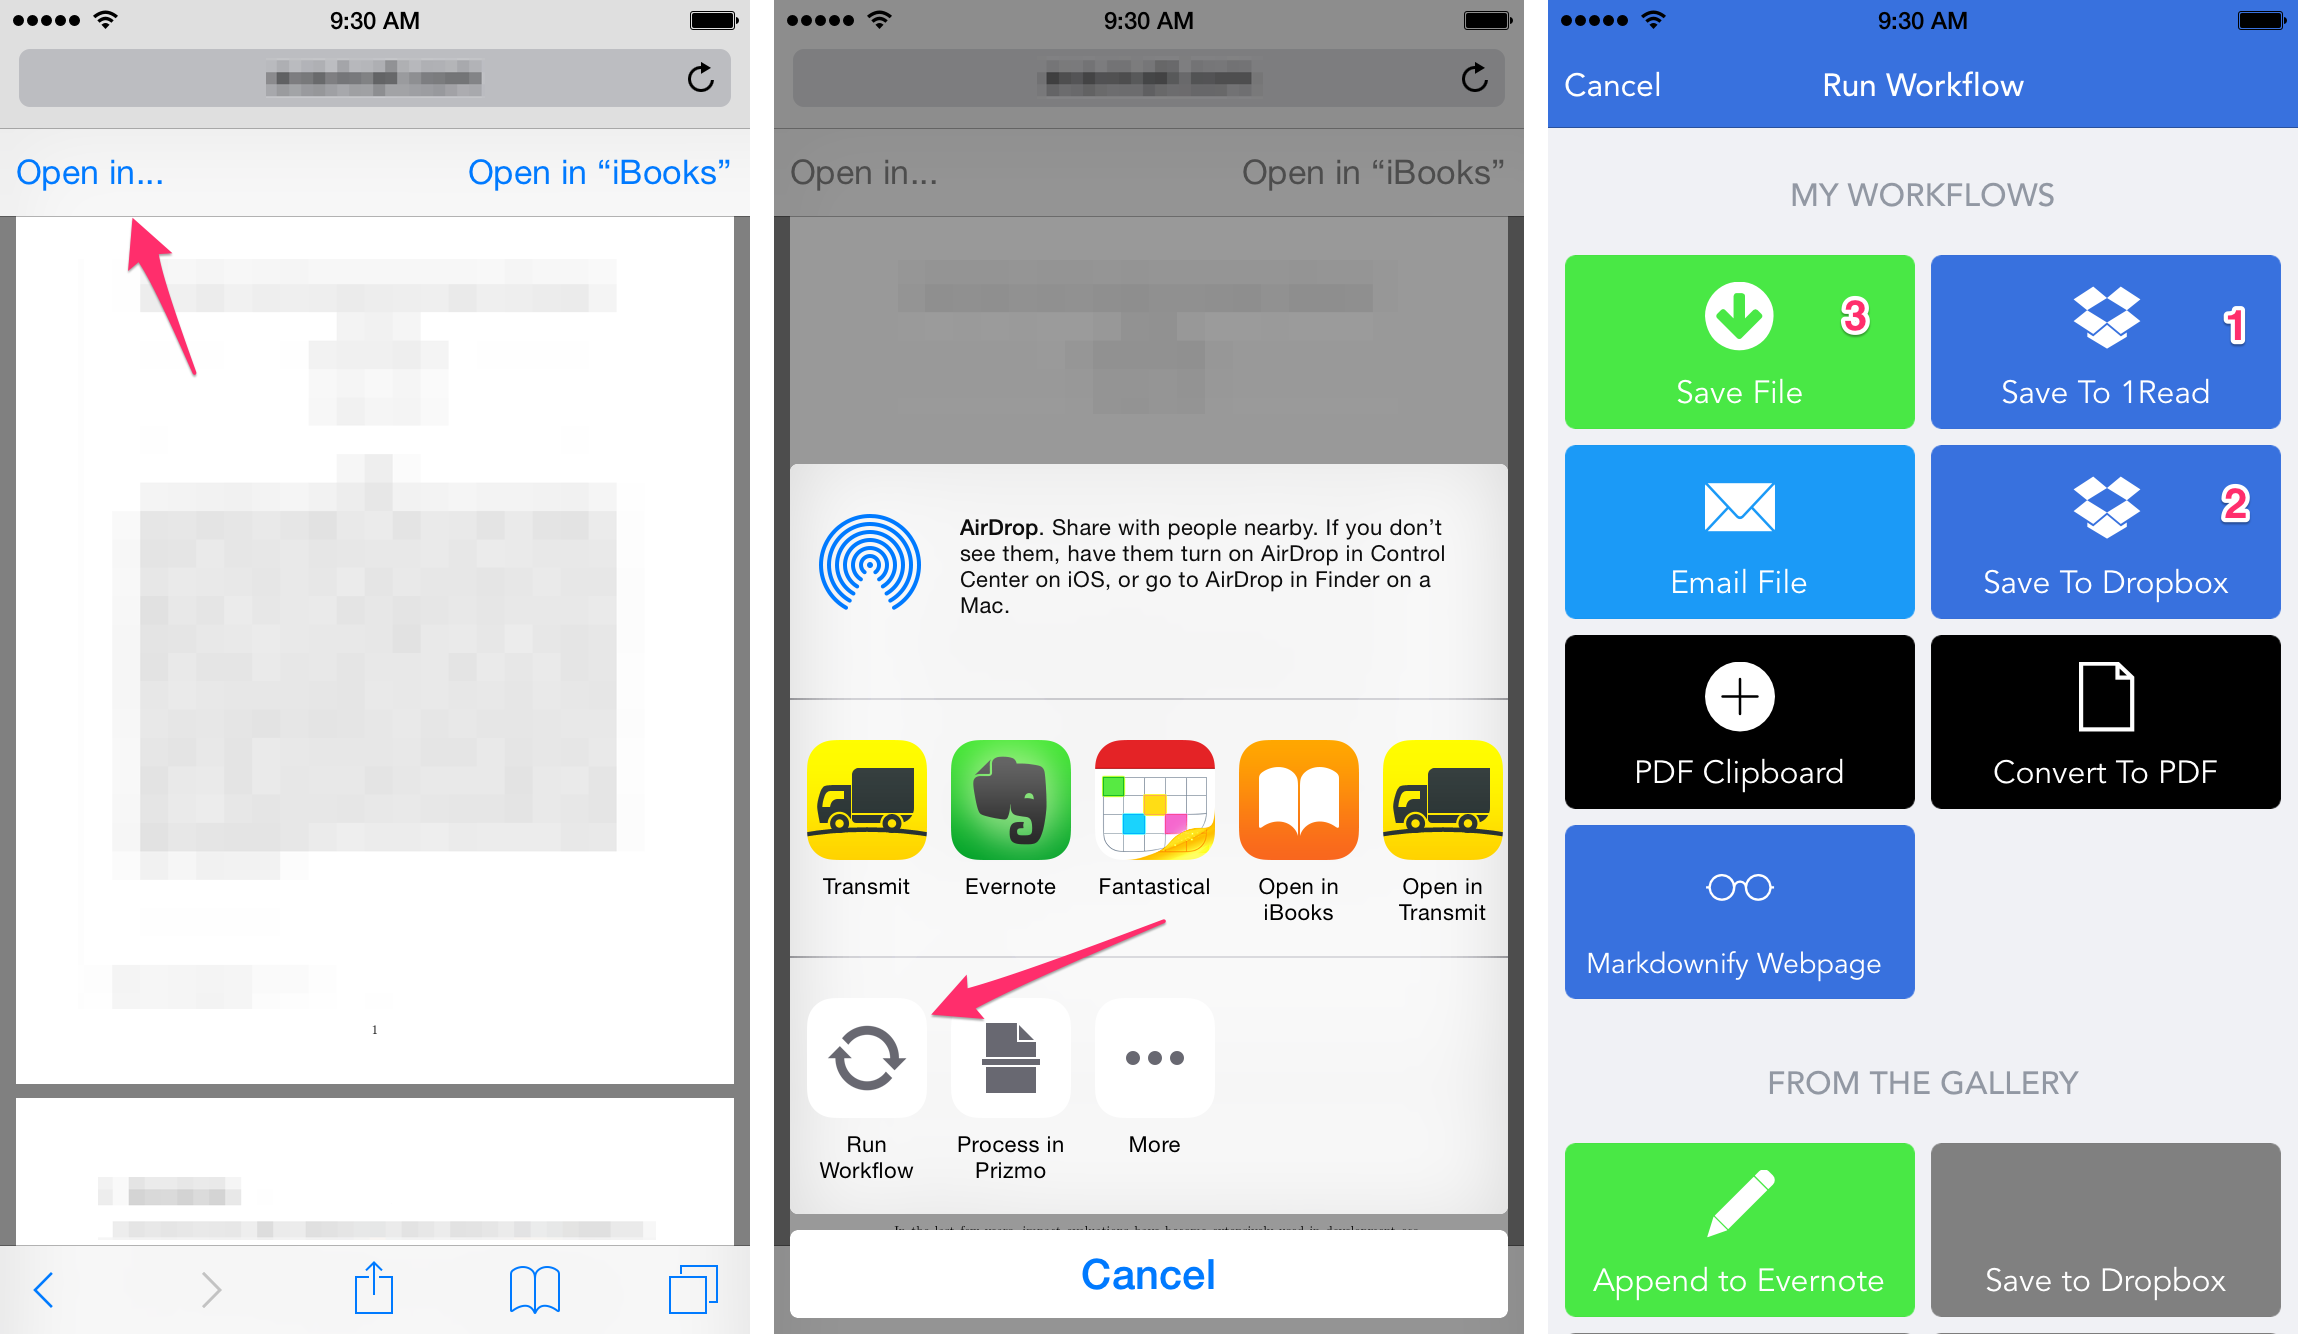
These actions, in increasing order of both complexity and flexibility are:
- Save the file to a folder in my Dropbox called “1Read,” where I save PDFs for later reading;
- Save the file to an arbitrary folder in Dropbox;
- Save the file to a folder in iCloud Drive, Dropbox, Box, Google Drive, or any other third party service that supports document provider extensions in iOS 8.
Here’s a collection of screenshots that show the 1Read workflow (1), the Dropbox workflow (2), and the iCloud Drive (3a) or third party document provider (3b) workflow:
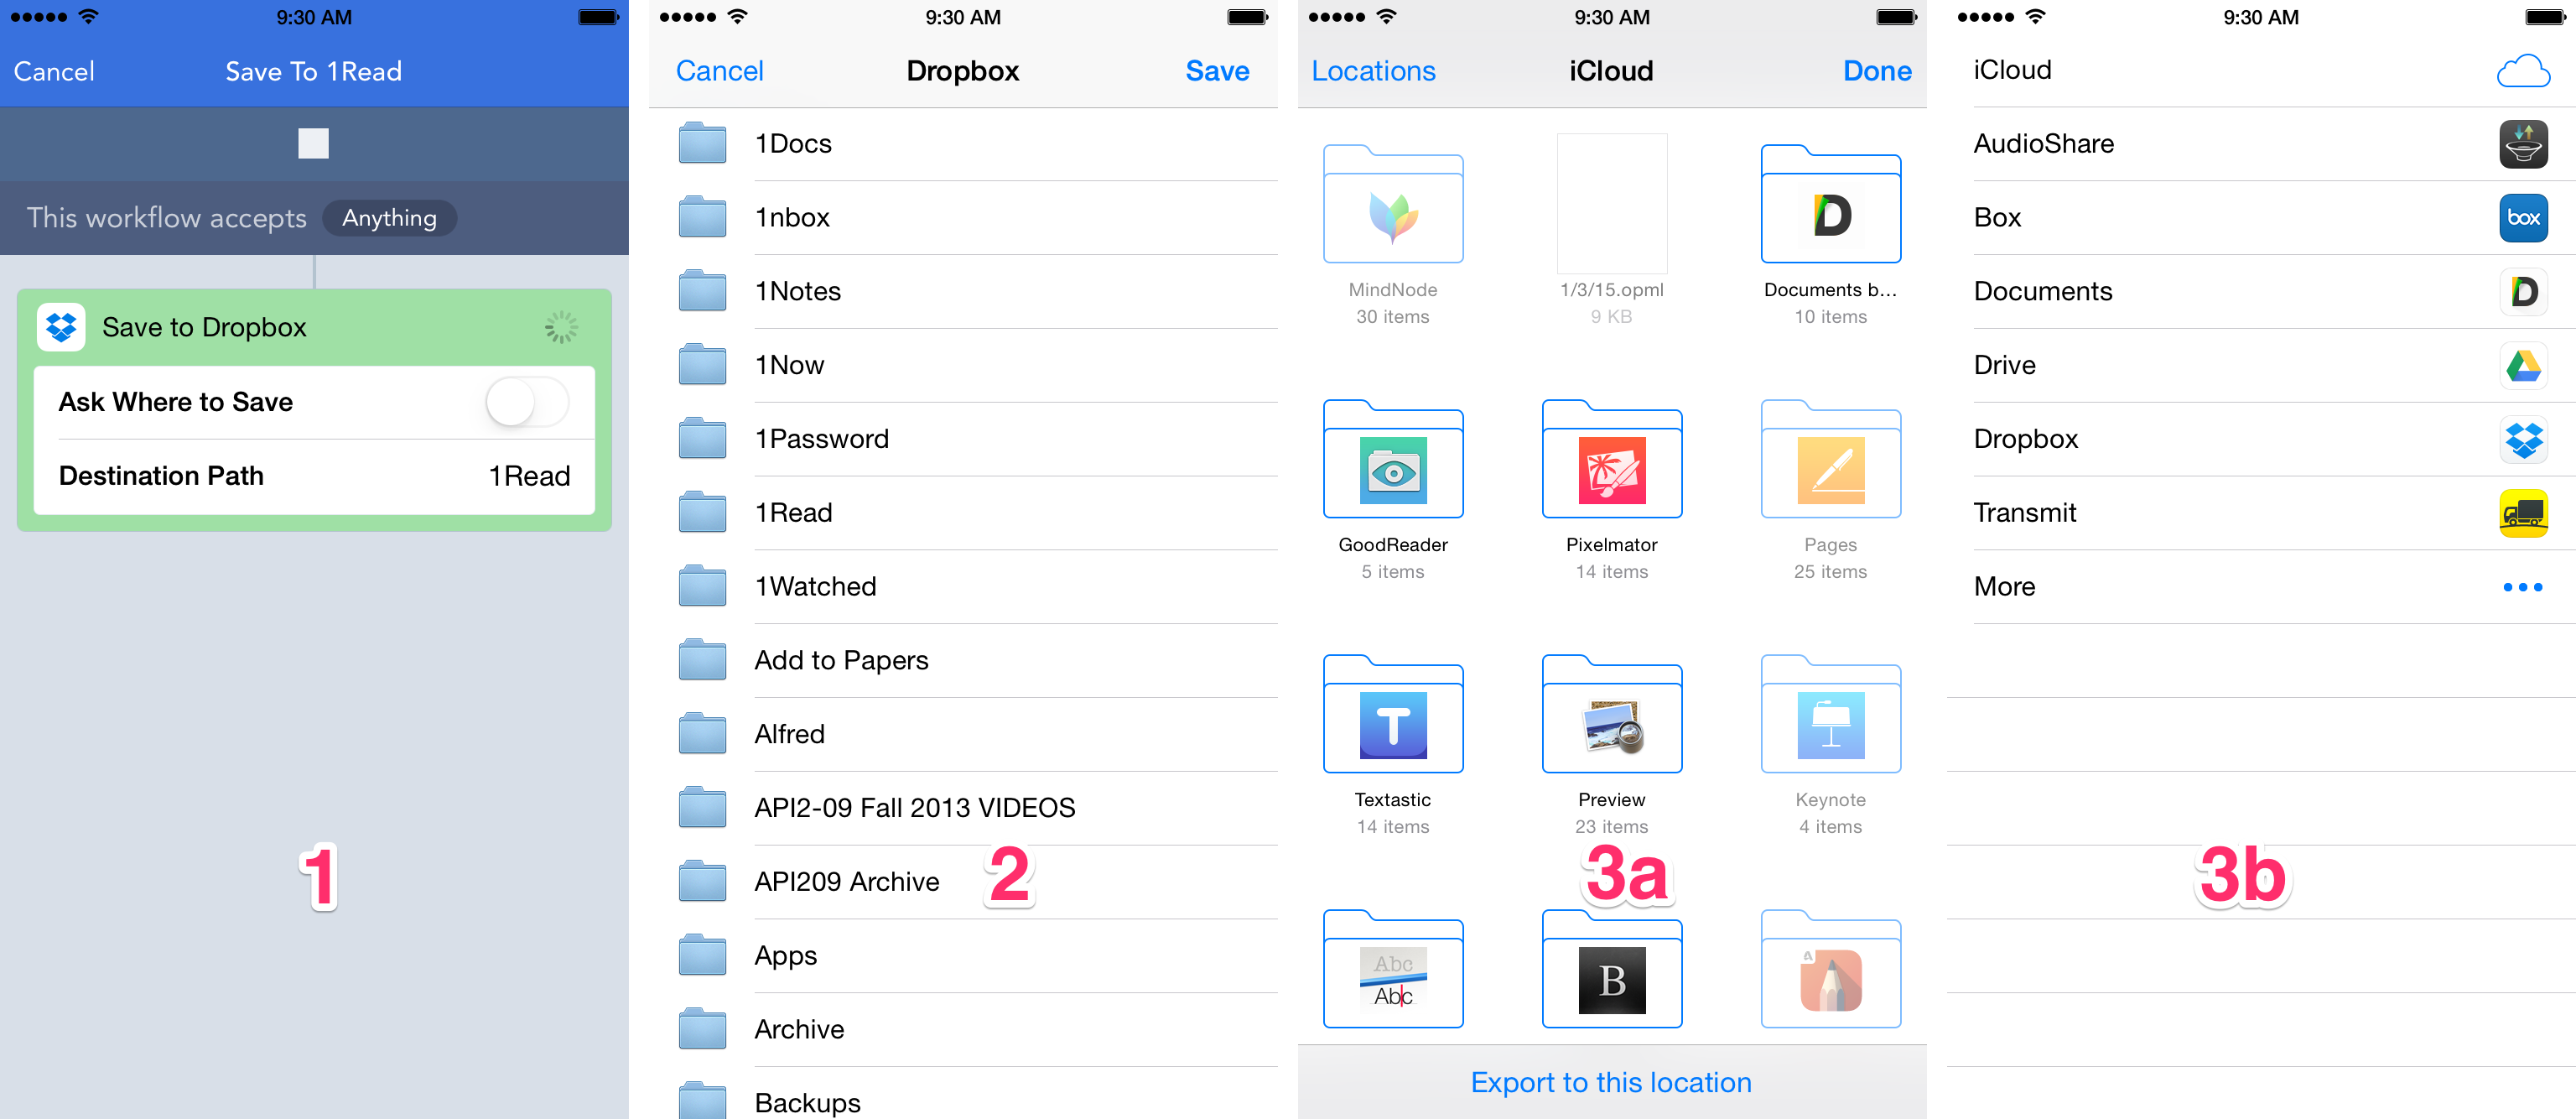
Workflow (1) has zero additional steps; it saves it to the 1Read folder and that’s it. Workflow (2) has the additional step of selecting a Dropbox folder in which to save the file. Workflow (3) involves first choosing a document provider, then choosing a folder1.
The crazy part
“That’s fine for a PhD student, but setting this up must take a lot of time, energy, and frustration.”
I hear you, dear reader, but fear not.
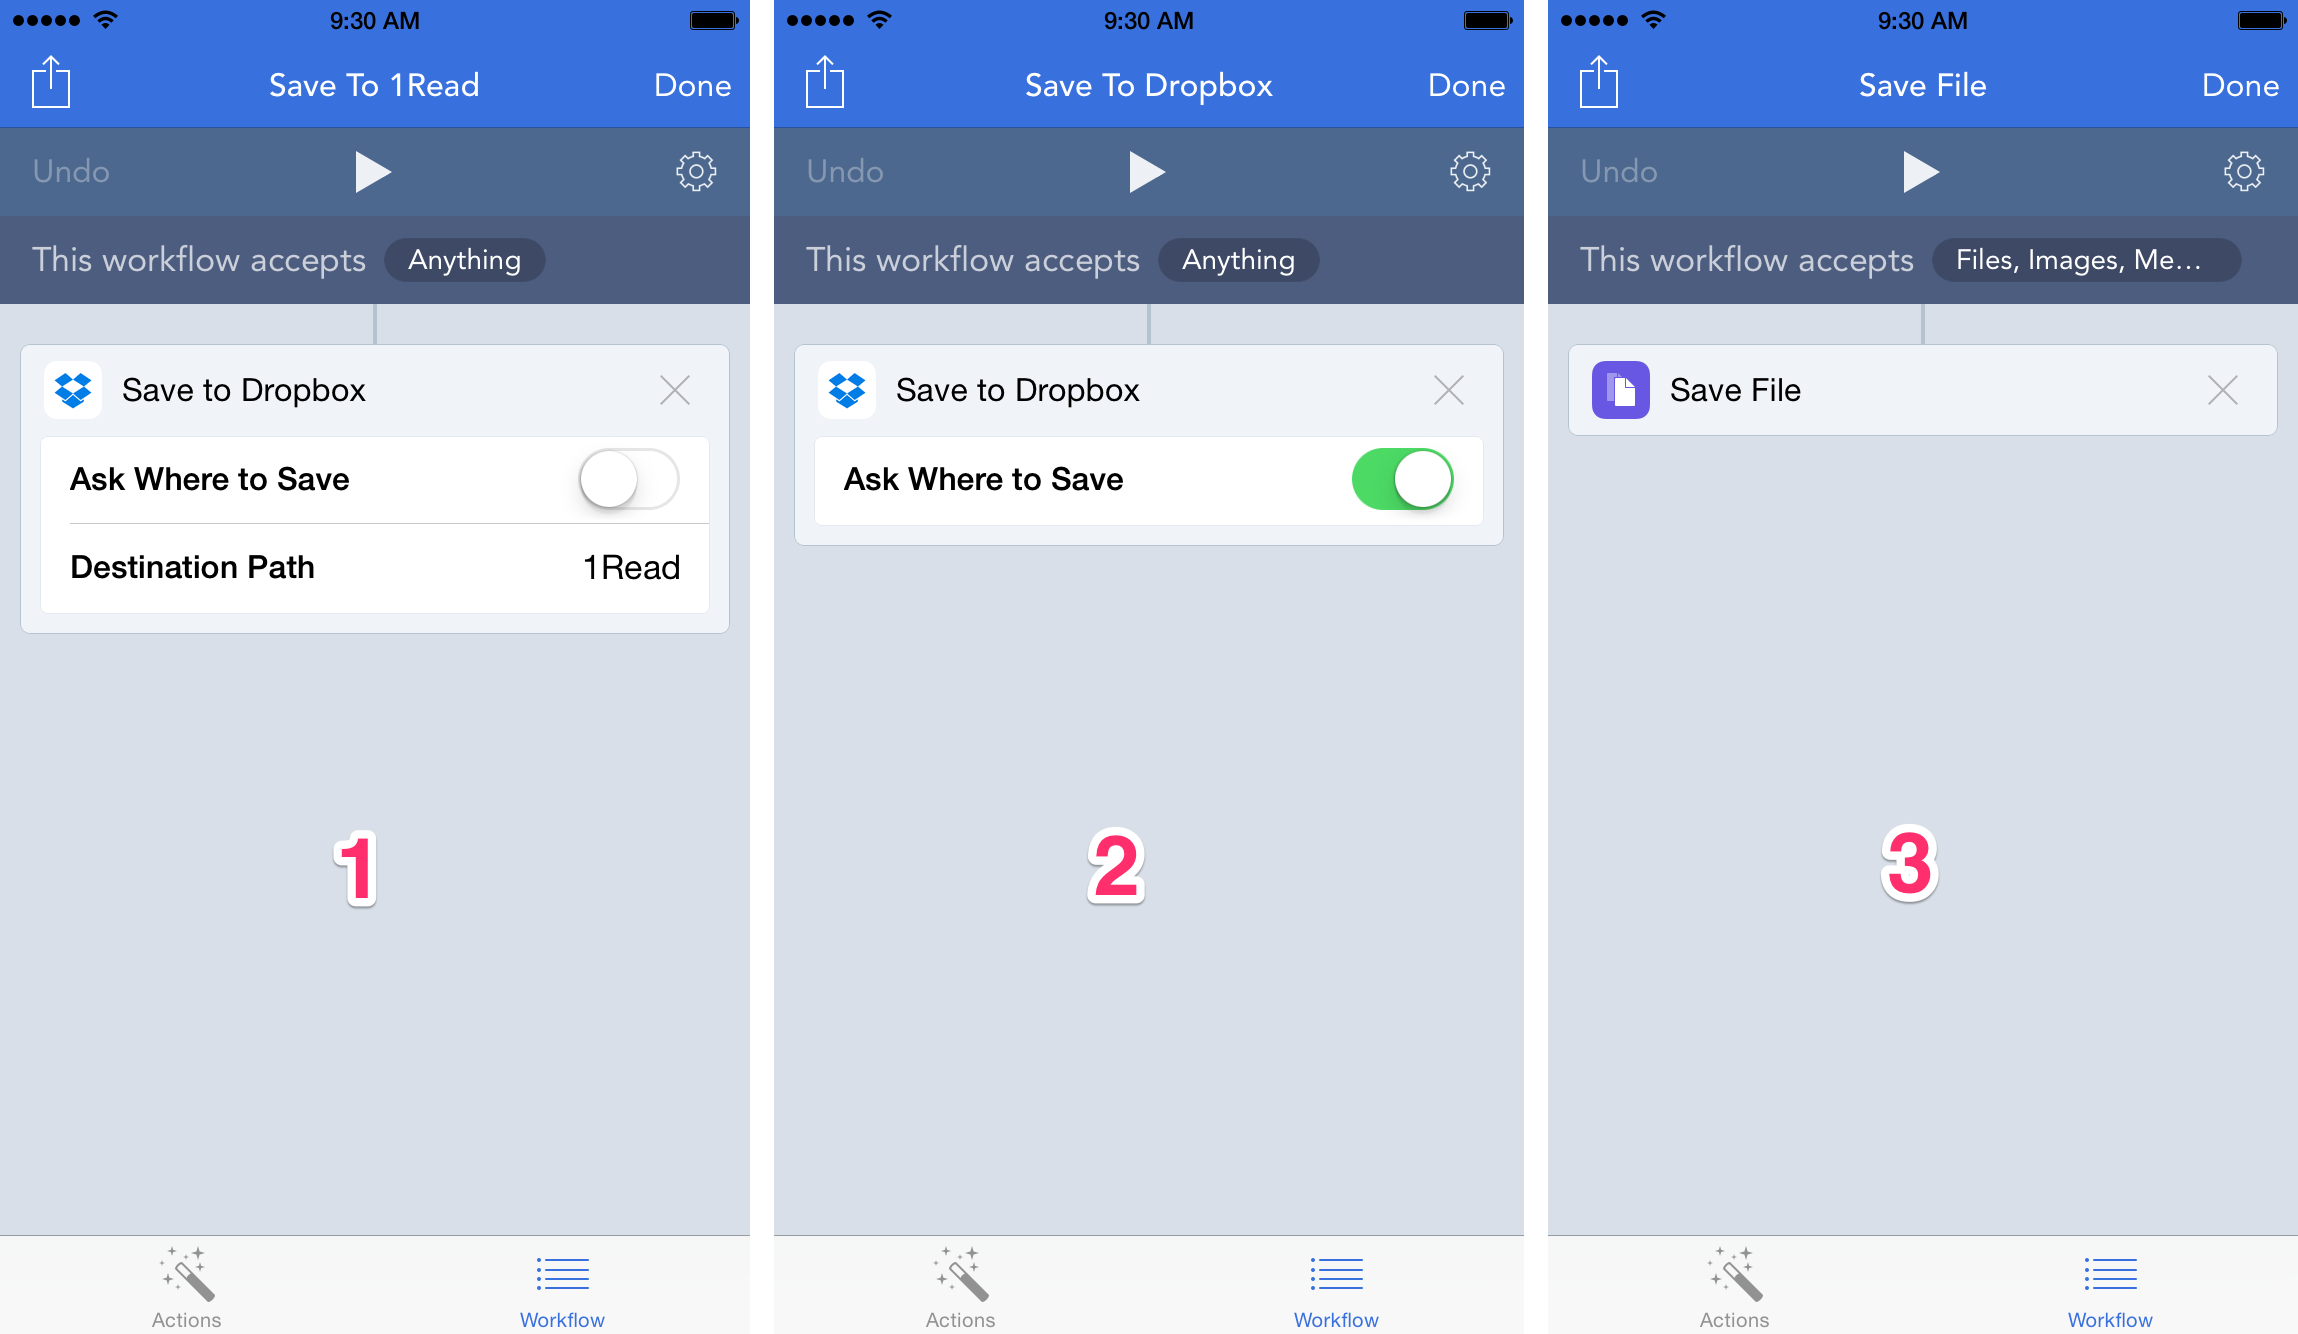
I give you, in its entirety, the setup for each of these three workflows:
Some notes:
- As you can see, Workflows (1) and (2) are identical, except for the toggle “Ask Where to Save.”
- If you have a frequently used “inbox” folder, it’s worth setting up a separate workflow just for that folder.
- Make sure you specify these workflows as “Action Extensions” so that they show up in the Share Sheet.
- Workflow (3) is one that I’ve come to rely on quite a bit. Besides the third party providers, iCloud Drive is actually a nice save location, since if you don’t have an internet connection at the time of saving, it’ll save it locally and upload it once you get a connection.
If you check out the @WorkflowHQ twitter page or the Workflow Gallery, you’ll find lots and lots of other Workflows. But this is one that’s easy to set up, easy to use, and fills a real need in my work habits.
-
You may notice that Dropbox is a document provider that shows up in Workflow (3). Since I use it so much, and since the native document picker will sometimes crash, I made a separate Dropbox-only action. ↩